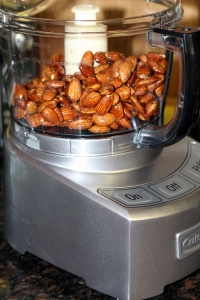
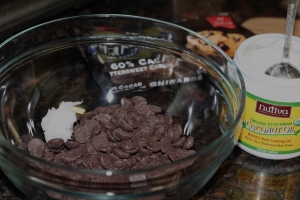
I’m back with two posts in two days. I guess things are looking up, or shall I say, looking productive. After professing my embarrassing level of love for my new food processor in yesterday’s post, I decided to use the maple cinnamon almond butter I made to make a couple of chocolatey treats. Let’s face it, nut butter + chocolate = the best combo ever/love/God’s gift to us as humans (Sorry Socrates, no choco for you).
I’m basically drooling all over the computer while trying to upload these pictures, so let’s get on with the recipes!
Maple Cinnamon Almond Butter Cups
Adapted from Edible Perspective
These almond butter cups are the fancy, adult version of your typical Reese’s. They are made with dark chocolate, so obviously they are healthy, and the almond butter is homemade, so you shouldn’t feel bad about sneaking a spoonful (or ten) while putting these little pieces of heaven together. Yield: 12-15 mini cups
Ingredients:
– One batch of maple cinnamon almond butter*
– One bag chocolate chips**
– 1 tablespoon coconut oil
– Optional: 2 plastic squeeze bottles – I didn’t have these but they would be very helpful in keeping things mess-free and making sure the chocolate and almond butter are evenly spread.
Instructions:
1. Line a mini muffin tin with cupcake liners
2. Pour the chocolate chips into a microwave safe bowl and add the coconut oil. Heat for about two minutes, stirring every 30 seconds, until chips are melted
3. Spoon about 2 teaspoons of the chocolate into the bottom of each liner
4. Spoon a little less than a tablespoon of almond butter on top of the chocolate
5. Top the almond butter with 2 teaspoons of melted chocolate, making sure the almond butter is completely covered
* You don’t really need an entire batch of the almond butter, but having a sample here and there while making the recipe will be a nice treat to break up the monotony of licking melted chocolate off your fingers every few seconds. Also, you could just pick up a jar of almond butter from the grocery store to use, or be a square and substitute peanut butter.
** I used Ghirardelli 70% dark chocolate chips, but you could use semi-sweet or milk chocolate. The almond butter is already sweet from the maple syrup, so I definitely think dark chocolate is the way to go.
Chocolate Covered Almond Butter Frozen Banana Bites
Yes, the title of the recipe is a mouthful but these treats are super easy to make and actually taste like ice cream once they’ve been in the freezer for a few hours. I was inspired by this recipe, but decided to substitute almond butter for the peanut butter, and add it right into the banana and mix it all up to give off a more creamy texture. The result? Success, and a much more inexpensive and healthy alternative to a container of ice cream. Yield: 2 dozen
Ingredients:
– 1/2 cup of maple cinnamon almond butter (or whatever nut butter you have on hand)
– 3 ripe bananas
– 1/2 bag dark chocolate chips
1. Using a food processor, blend the bananas and almond butter together until creamy (you could stir it all together in a bowl, just make sure the mixture has a very creamy and smooth texture)
2. Chill the mixture in the freezer for at least a few hours, you want to be able to scoop it, so it shouldn’t be frozen solid or too liquid-y
3. Line a baking or cookie sheet with parchment paper. Using a tablespoon cookie scoop, scoop the banana mixture onto the parchment paper
4. Place the banana bites in the freezer and chill for 20-30 minutes
5. While the banana bites are in the freezer, melt the chocolate chips in the microwave, stirring every 30 seconds until smooth
6. Drop one banana bite at a time into the melted chocolate and stir around until fully covered. Using a fork, gently pick up the chocolate covered banana bite and place it back on the parchment.
7. If you are using toppings, now’s the time to sprinkle them on.
8. Once all the banana bites are covered in chocolate, transfer the cookie sheet back to the freezer. Once they are frozen solid, about 2-3 hours later, transfer them to a freezer safe container, or just stand by the fridge and eat them all (just kidding, don’t do that!)

These will last a couple of weeks in the freezer, and they really do get better as they freeze longer.
We’re off to a gym-warming party at Steve’s Crossfit gym tonight, so we’ll probably be indulging in leftovers for dinner. We used a few items from our CSA to make the delicious sandwiches below, and we also have some leftover veggie spaghetti, so I’m excited to eat good food while avoiding the dirty kitchen and sink full of dishes that normally goes along with it.
Have a happy weekend!


